本系列为 Three.js journey 教程学习笔记。
Shadows 影
我们已经学习了光,现在想要增加一些影。几何体的背光面确实是暗的,这被称为 core shadow,我们缺失的是 drop shadow (投影),物体投射到其他物体上的影子。
投影对于实时3D渲染来说比较挑战性能,开发者需要寻找各种 trick 的方案来合理的实现投影。
我们本节将学习 Three.js 内置的投影、烘焙投影(Baking Shadow)、自己绘制等方式。
Three.js 中的投影
原理
这里先简单讲一下投影的工作原理,不做深入研究。
在执行渲染的时候,Three.js 将先渲染每个光支持的投影,这些渲染器将模拟光看到的样子(假设光源处有个相机),在这个过程中,MeshDepthMaterial 将替代所有的其他材质进行渲染。这个渲染的结果被存为一种 Texture 并且被称为 shadow maps,下面这个示例很好的展示了这一过程。https://threejs.org/examples/webgl_shadowmap_viewer.html
我们不能直接看到这个 shadow maps,但它用于其他几何体上接受投影和发射投影。
准备
先绘制一个平面和一个球,用作产生投影的物体。并添加环境光和平行光。
import * as THREE from 'three'
import './style.css'
import { OrbitControls } from 'three/examples/jsm/controls/OrbitControls'
import * as dat from 'lil-gui'
import stats from '../common/stats'
import { listenResize } from '../common/utils'

// Canvas
const canvas = document.querySelector('#mainCanvas') as HTMLCanvasElement

// Scene
const scene = new THREE.Scene()

/**
 * Objects
 */
// Material
const material = new THREE.MeshStandardMaterial()
material.metalness = 0
material.roughness = 0.4

// Objects
const sphere = new THREE.Mesh(new THREE.SphereGeometry(0.5, 32, 32), material)

const plane = new THREE.Mesh(new THREE.PlaneGeometry(5, 5), material)
plane.rotation.set(-Math.PI / 2, 0, 0)
plane.position.set(0, -0.65, 0)

scene.add(sphere, plane)

/**
 * Lights
 */
const ambientLight = new THREE.AmbientLight('#ffffff', 0.5)
scene.add(ambientLight)

const directionalLight = new THREE.DirectionalLight('#ffffaa', 0.5)
directionalLight.position.set(1, 0.25, 0)
scene.add(directionalLight)

const directionalLightHelper = new THREE.DirectionalLightHelper(directionalLight)
scene.add(directionalLightHelper)

// Size
const sizes = {
  width: window.innerWidth,
  height: window.innerHeight,
}

// Camera
const camera = new THREE.PerspectiveCamera(75, sizes.width / sizes.height, 0.1, 100)
camera.position.set(1, 1, 2)

const controls = new OrbitControls(camera, canvas)
controls.enableDamping = true

// Renderer
const renderer = new THREE.WebGLRenderer({
  canvas,
})
renderer.setSize(sizes.width, sizes.height)
renderer.setPixelRatio(Math.min(window.devicePixelRatio, 2))

listenResize(sizes, camera, renderer)


// Animations
const tick = () => {
  stats.begin()

  controls.update()

  // Render
  renderer.render(scene, camera)
  stats.end()
  requestAnimationFrame(tick)
}

tick()

/**
 * Debug
 */
const gui = new dat.GUI()

const meshFolder = gui.addFolder('Mesh')
meshFolder.add(material, 'metalness', 0, 1, 0.0001)
meshFolder.add(material, 'roughness', 0, 1, 0.0001)
meshFolder.add(material, 'wireframe')

const ambientLightFolder = gui.addFolder('AmbientLight')
ambientLightFolder.add(ambientLight, 'visible').listen()
ambientLightFolder.add(ambientLight, 'intensity', 0, 1, 0.001)

const directionalLightFolder = gui.addFolder('DirectionalLight')
directionalLightFolder
  .add(directionalLight, 'visible')
  .onChange((visible: boolean) => {
    directionalLightHelper.visible = visible
  })
  .listen()
directionalLightFolder.add(directionalLightHelper, 'visible').name('helper visible').listen()
directionalLightFolder.add(directionalLight, 'intensity', 0, 1, 0.001)


const guiObj = {
  turnOffAllLights() {
    ambientLight.visible = false
    directionalLight.visible = false
    directionalLightHelper.visible = false
  },
  turnOnAllLights() {
    ambientLight.visible = true
    directionalLight.visible = true
    directionalLightHelper.visible = true
  },
}

在线 demo 链接
可扫码访问

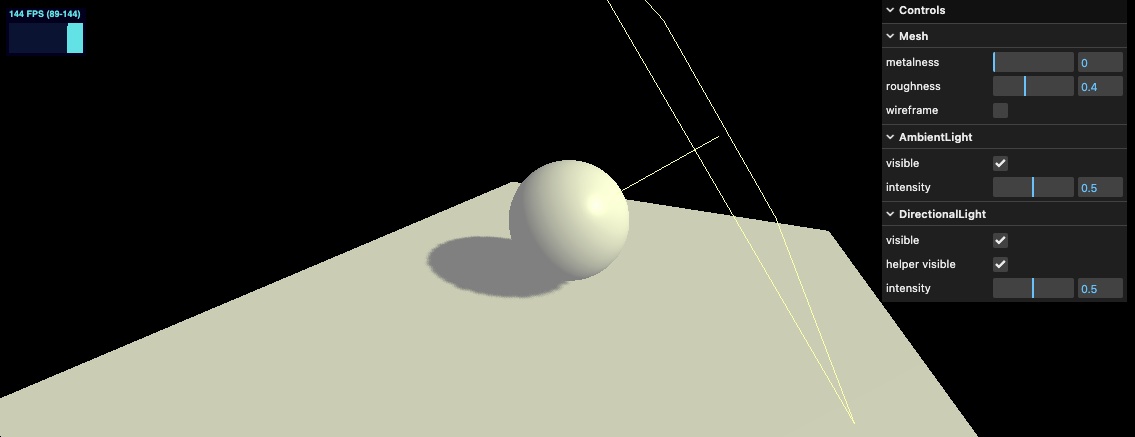
开启投影
首先,需要在 renderer 上开启 shadowMap
renderer.shadowMap.enabled = true
然后在几何体上开启发射投影和接受投影
sphere.castShadow = true
...
plane.receiveShadow = true
最后在光照上增加发射投影的属性
directionalLight.castShadow = true
需要注意的时,仅在以下3种光照中可以发射投影
- PointLight
- DirectionalLight
- SpotLight
在线 demo 链接
可扫码访问

Shadow map 的优化
渲染尺寸
打印 directionalLight.shadow 属性观察,可以看到
console.log(directionalLight.shadow)

可以看到 shadow 各种属性。
放大观察投影,可以看到边缘类似马赛克的样子。

使用 shadow.mapSize 设置更大尺寸,可以让投影贴图清晰度更高,看起来投影效果更好。
directionalLight.shadow.mapSize.width = 1024
directionalLight.shadow.mapSize.height = 1024

Near and far
因为 Three.js 是使用相机来渲染 shadow maps 的,所以相机里的属性在这里也同样适用。因此我们也要设置 near 和 far 属性,虽然不能提高渲染的效果或性能,但它能修复看不到阴影或阴影突然被裁剪的错误。
为了更清晰的看到 Camera 效果,我们使用 Helper
const directionalLightCameraHelper = new THREE.CameraHelper(directionalLight.shadow.camera)
scene.add(directionalLightCameraHelper)

添加属性后
directionalLight.shadow.camera.near = 1
directionalLight.shadow.camera.far = 6

shadow camera 尺寸
目前看,camera 的尺寸也太大,因为我们使用的平行光,所以相机也是正交相机,可以直接设置相机范围尺寸。
directionalLight.shadow.camera.top = 2
directionalLight.shadow.camera.right = 2
directionalLight.shadow.camera.bottom = - 2
directionalLight.shadow.camera.left = - 2

Blur 模糊
directionalLight.shadow.radius = 10
投影算法
- BasicShadowMap 能够给出没有经过过滤的阴影映射 —— 速度最快,但质量最差。
- PCFShadowMap 为默认值,使用Percentage-Closer Filtering (PCF)算法来过滤阴影映射。
- PCFSoftShadowMap 和PCFShadowMap一样使用 Percentage-Closer Filtering (PCF) 算法过滤阴影映射,但在使用低分辨率阴影图时具有更好的软阴影。
- VSMShadowMap 使用Variance Shadow Map (VSM)算法来过滤阴影映射。当使用VSMShadowMap时,所有阴影接收者也将会投射阴影。
改变投影算法可以使用如下代码
renderer.shadowMap.type = THREE.PCFSoftShadowMap
需要注意的是 THREE.PCFSoftShadowMap 不支持 radius
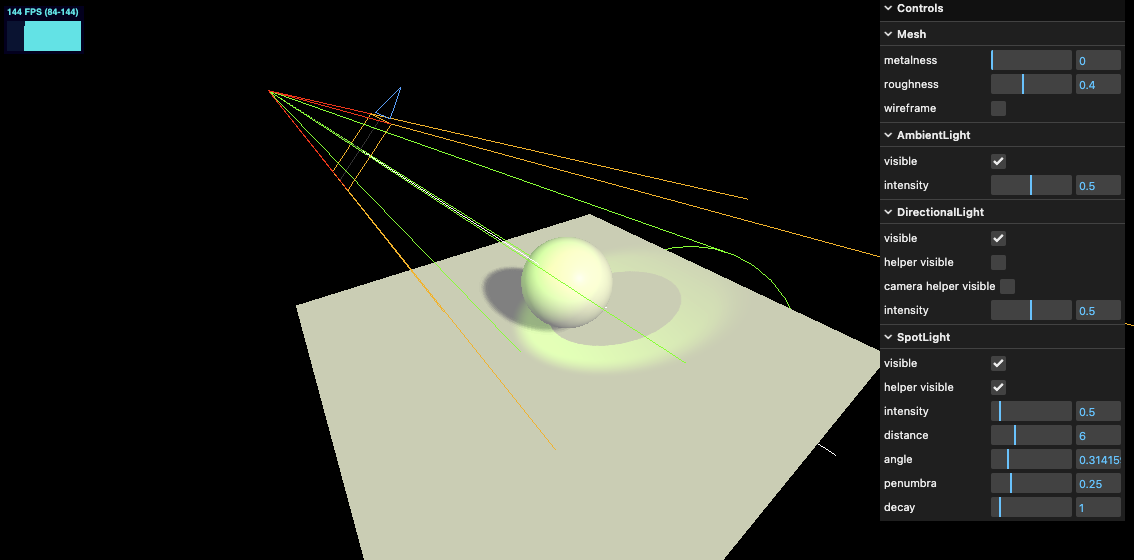
SpotLight 聚光灯下的投影
const spotLight = new THREE.SpotLight(0x78ff00, 0.5, 10, Math.PI * 0.1, 0.25, 1)
spotLight.distance = 6
spotLight.position.set(0, 2, 2)
spotLight.castShadow = true
scene.add(spotLight)

const spotLightHelper = new THREE.SpotLightHelper(spotLight)
scene.add(spotLightHelper)

const spotLightCameraHelper = new THREE.CameraHelper(spotLight.shadow.camera)
scene.add(spotLightCameraHelper)
同样我们可以使用 shadow.mapSize 带来更好质量的投影
spotLight.shadow.mapSize.set(1024, 1024)
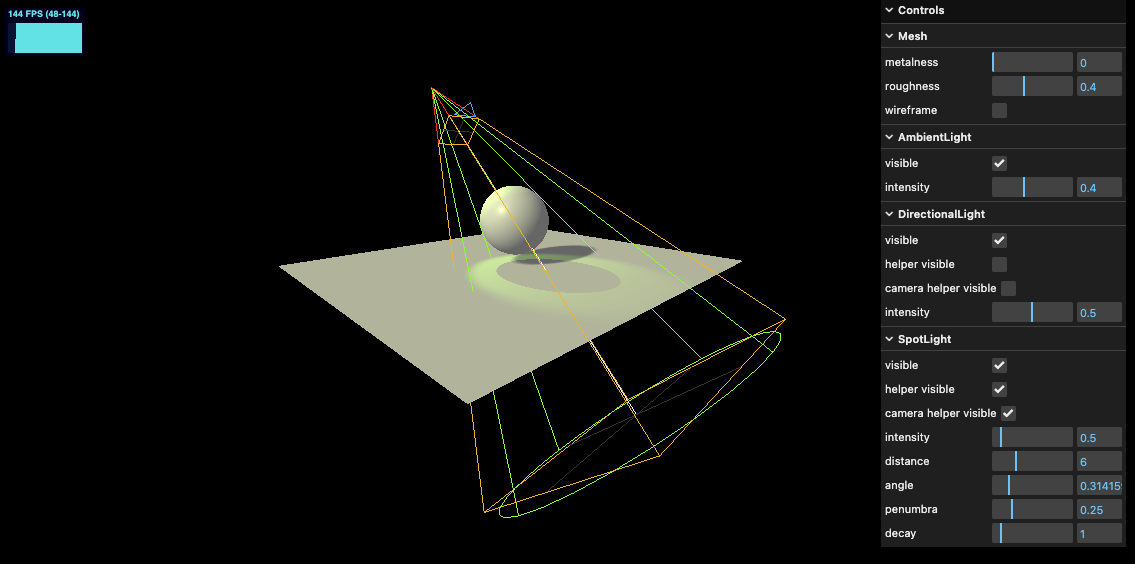
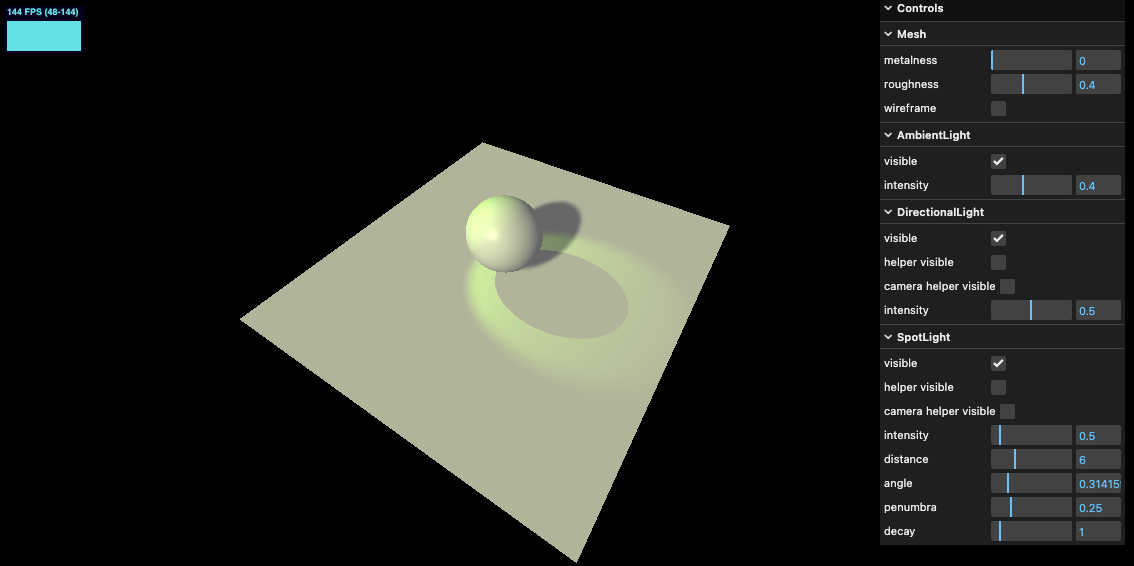
正因为我们使用的聚光灯,其投影相机为透视相机。我们可以改变其属性
spotLight.shadow.camera.fov = 30
spotLight.shadow.camera.near = 1
spotLight.shadow.camera.far = 6
移除 Helper 效果
PointLight 下的投影效果
添加点光源与相应的 Helper
const pointLight = new THREE.PointLight(0xff9000, 0.5, 10, 2)
pointLight.position.set(-1, 1, 0)
pointLight.castShadow = true
pointLight.shadow.radius = 10
scene.add(pointLight)

const pointLightHelper = new THREE.PointLightHelper(pointLight)
scene.add(pointLightHelper)

const pointLightCameraHelper = new THREE.CameraHelper(pointLight.shadow.camera)
scene.add(pointLightCameraHelper)
效果如下

可以看到 Helper 也是投影相机,但是只有向下的,这是因为点光源的 ShadowMap 投影相机是6个面的,可以认为是个立方体,camera helper 展示的是最后一个相机的渲染。
同样我们可以设置一些其他属性
pointLight.shadow.mapSize.width = 1024
pointLight.shadow.mapSize.height = 1024

pointLight.shadow.camera.near = 0.1
pointLight.shadow.camera.far = 5
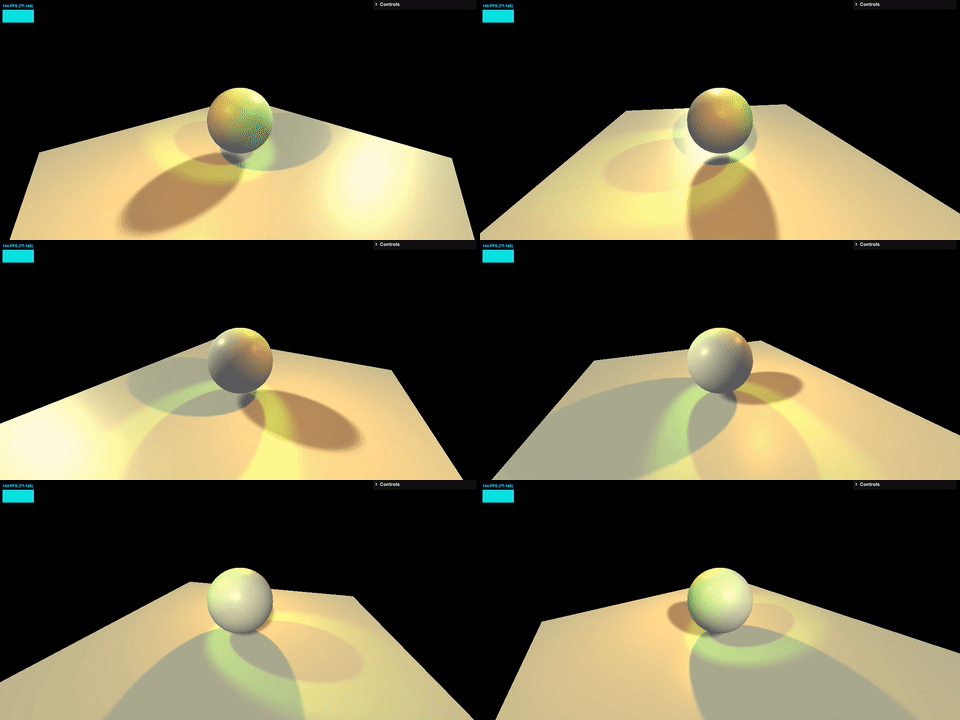
最终整体效果如下

移除 Helper 后
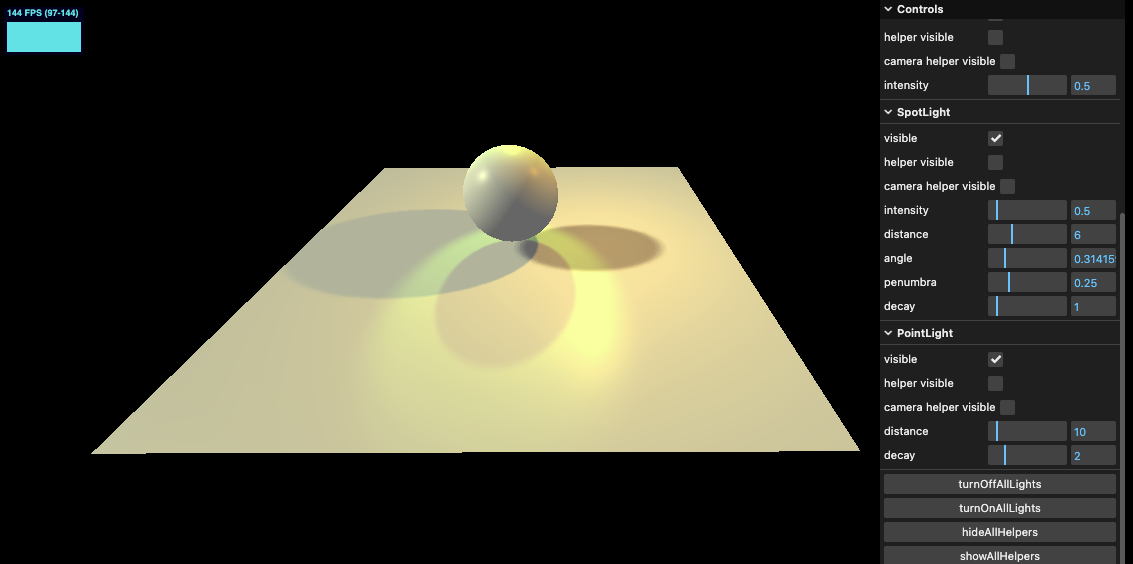
添加一点自动旋转
在线 demo 链接
可扫码访问

烘焙投影(Baking Shadow)
如果场景物体简单,Three.js 内置的投影非常好用,但是可能会比较复杂。另一个好的方案是 baked shadow 烘焙投影。我们之前讲过 baking light,而 baking shadow 与之类似。shadow 被集成在纹理中,直接贴图到材质中使用。
我们使用这样的一张贴图放在平面上

// Texture
const textureLoader = new THREE.TextureLoader()
const bakedShadow = textureLoader.load('../assets/textures/bakedShadow.jpg')

...

const plane = new THREE.Mesh(new THREE.PlaneGeometry(5, 5), new THREE.MeshBasicMaterial({
  map: bakedShadow,
}))
显而易见,这么做的缺点是投影的固定的,不能随着物体或光照的移动而实时渲染。对于固定的物体来说是没有问题的。
效果如下

在线 demo 链接
可扫码访问

自行绘制模拟投影
另一种方式就是自行绘制一个投影平面,跟随物体一起运动,这里举个例子
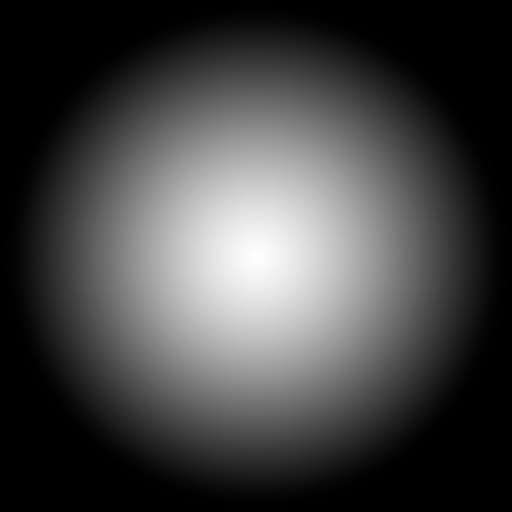
首先将之前修改过的底面阴影纹理移除,在增加一个平面,赋材质投影 alpha 贴图(黑色部分透明渲染)。贴图如下
// Texture
const textureLoader = new THREE.TextureLoader()
const simpleShadow = textureLoader.load('../assets/textures/simpleShadow.jpg')

...

const shadowPlane = new THREE.Mesh(
  new THREE.PlaneGeometry(1.5, 1.5),
  new THREE.MeshBasicMaterial({
    color: '#000000',
    transparent: true,
    alphaMap: simpleShadow,
  }),
)

shadowPlane.rotateX(-Math.PI / 2)
shadowPlane.position.y = plane.position.y + 0.01

scene.add(sphere, plane, shadowPlane)
效果如下

接下来我们增加一些运动,并设置光影平面跟随小球运动
// Clock
const clock = new THREE.Clock()

// Animations
const tick = () => {
  stats.begin()
  const elapsedTime = clock.getElapsedTime()

  sphere.position.x = Math.sin(elapsedTime) * 1.5
  sphere.position.z = Math.cos(elapsedTime) * 1.5
  sphere.position.y = Math.abs(Math.sin(elapsedTime * 2.5))

  shadowPlane.position.x = sphere.position.x
  shadowPlane.position.z = sphere.position.z
  shadowPlane.material.opacity = (1 - sphere.position.y) * 0.6

  controls.update()

  // Render
  renderer.render(scene, camera)
  stats.end()
  requestAnimationFrame(tick)
}
效果如下

在线 demo 链接
可扫码访问

小结
本节学习了投影的 3 种方式,怎么使用还是要看具体场景。但原则就是开销越小越好,可以混合使用这 3 种投影技术